By Bennett's Concrete and Excavation, Norwich, NY. Updated October 2026.
How it works
Warm water from a boiler or heat pump circulates through PEX tubing embedded in the slab. The concrete soaks up that heat and gives it back slowly and evenly across the whole floor. It's popular in shops, garages, barns and barndominiums because the heat is where your feet are, and the floor stays warm even when overhead doors open.
The Radiant Professionals Alliance (RPA) guidelines limit fluid temperature to 140°F in concrete thermal mass unless the tubing maker approves otherwise. Your heating designer sets the temperatures, tube spacing and loop layout.
The layers, from the ground up
- Compacted crushed stone base.
- Vapor retarder.
- Rigid foam insulation board.
- Reinforcement, if the slab design calls for it.
- PEX tubing, tied or clipped in loops to the layout.
- Concrete, placed and finished around and over the tubing.
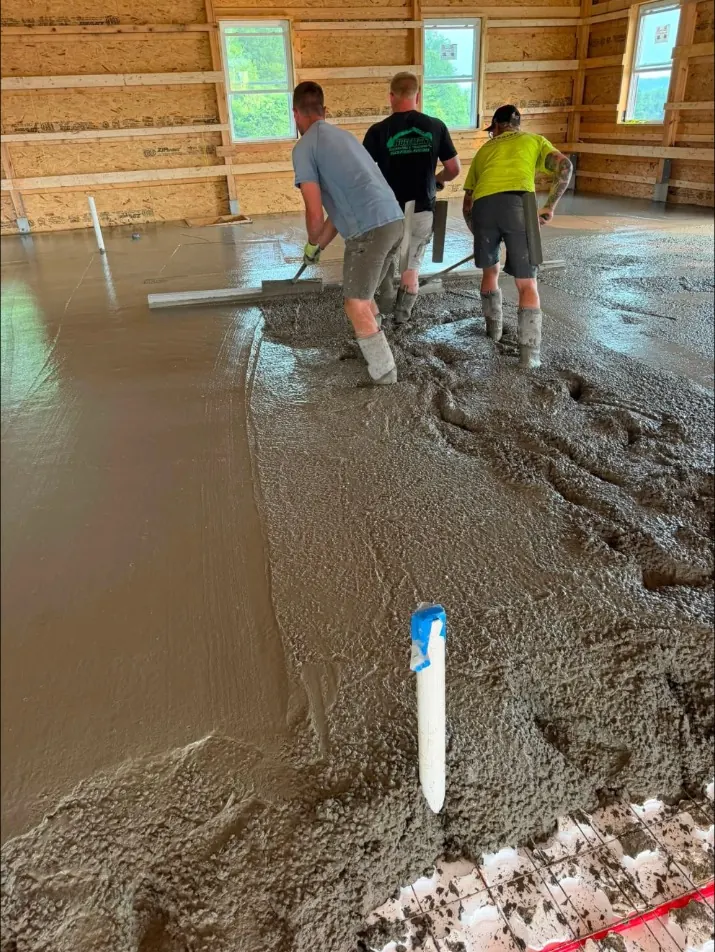
On the barndo floor we poured in Holland Patent, about 60 yards of concrete, the radiant tubing was laid on insulation board before the pour.
Insulation under the slab
Without insulation, much of the heat goes down into the ground instead of up into the room. RPA's slab-on-grade guidelines list several approaches, including R-5 under the entire slab and slab edge, or R-5 extending 4 feet horizontally or vertically at the perimeter. The energy code has its own requirements for heated slabs, so your designer and code officer should confirm what applies to your building.
Pressure test before and during the pour
Once concrete covers a leak, fixing it means breaking out the slab. RPA's guidelines call for pressure testing the tubing at 100 psi for at least 30 minutes, then reducing to 30 psi before the concrete is poured, so the system stays under pressure while the concrete goes in. A drop on the gauge during the pour points to damage that can be found and fixed right away.
RPA also says there should be no tubing joints in the slab, and any repair during the pour must use a factory-approved fitting.
Depth, joints and saw cuts
RPA calls for tubing in a structural slab to sit at least 2 inches below the surface. Where tubing crosses an expansion joint, it should be sleeved at least 4 inches on each side of the joint.
Control joints need planning too. NRMCA says saw cut joints should be at least one-quarter of the slab thickness deep. That cut must stay above the tubing, so the tubing layout, the joint layout and the slab thickness all have to agree before the pour. A marked-up plan showing loop routes and joint lines prevents a very expensive mistake.
Decisions to make before the tubing goes down
- Zones: a living area, a shop bay and a garage bay may each want their own loop and thermostat.
- Manifold location: usually on an interior wall where it can be reached and won't be blocked later.
- No-tubing areas: places where you'll drill into the floor, like lift anchors, racking, equipment bolts or interior wall plates, should stay clear of tubing.
- Drains and plumbing: floor drains and plumbing stubs are set first so tubing can route around them.
- Door openings: where tubing runs near overhead doors, and how the slab edge there is insulated.
- Sensors: many systems use a floor sensor that has to be placed before the pour.
Write these on the plan, take photos of the tubing before the concrete goes in, and keep them. Years later, those photos tell you where it's safe to drill.
Pour day
- The heating contractor confirms the tubing is under pressure and the manifold locations are protected.
- The crew walks carefully and keeps wheelbarrows, hoses and tools off the tubing where possible.
- A pump truck often places the concrete on big floors, which keeps trucks and chutes off the layout.
- The slab is screeded, floated and power troweled like any interior floor.
- Joints are cut to the planned layout and depth.
Heating it up and next steps
Ask your heating contractor when the system can be started and how fast to bring it up to temperature; the tubing maker's instructions govern. Bennett's pours pole barn and barndo floors and slabs over radiant tubing laid out by your heating contractor. See also the pole barn floor guide and vapor barriers under slabs.